


Sync your joint mobility progress with Apple Health
Instead of manually copying step counts into a joint-mobility diary every day, use Apple Health to collect walking data automatically and keep a separate note about comfort and stiffness. This 2026 guide shows you how to connect those records without mistaking walking trends for a measurement of joint range of motion.
- To track joint mobility Apple Health provides walking trends, not a direct joint range-of-motion measurement.
- Use Apple Health for steps and walking speed; keep comfort and stiffness in a separate daily log.
- TruNutra sells dietary supplements, not an Apple Health integration or mobility-tracking app.
- Check data sources before interpreting changes, and never count the same activity twice.
Why this matters
Apple Health tracks aspects of how you walk; it does not tell you how far a particular joint bends. Steps describe activity volume. Walking speed describes pace. Neither explains why your knee felt stiff after sitting or whether your shoulder moved more freely.
The useful workflow combines automatically collected movement data with a brief personal record. You get less copying, clearer context, and something concrete to discuss with a qualified health professional. You do not get a diagnosis or proof that a supplement changed your mobility.
TruNutra is for adults considering dietary supplements alongside everyday wellness routines, not for mobility-data tracking. Keep that distinction clear when reviewing your 2026 routine: a supplement decision and a tracking setup serve different purposes.
Before you start
- Have your iPhone and Health app ready. Update your software, keep your phone with you during ordinary walking, and allow motion tracking. An Apple Watch is optional, not required for the basic workflow.
- Choose a place for your comfort log. A paper notebook or a note on your phone works. Record the date, the joint or movement you are observing, and a short description of how it felt.
- Know the gotcha: movement data is not joint-angle data. Apple Health does not provide a general-purpose joint-mobility diary. Some walking measurements also need sufficient qualifying walking data before they appear; enabling access does not create an immediate reading.
Before recording a new movement, ask a qualified health professional if you have an injury, a recent procedure, or restrictions on activity. Do not push through pain to produce a better-looking chart.
Choose your recording method
For a simple 2026 setup, start with the iPhone you already carry. Add another device only when it solves a specific recording problem, such as leaving your phone behind during walks.
| Recording method | Best for | Advantage | Limitation |
|---|---|---|---|
| iPhone movement recording | Adults who carry their phone during daily walking | Collects steps and supported walking measurements without daily copying | Misses activity when the phone is left behind; measurements depend on qualifying data |
| Apple Watch recording | Adults who prefer a wrist-worn activity record | Records steps and activity while worn | Requires a paired device and consistent wear; activity data still does not measure joint range of motion |
| Manual step entry | Filling a known recording gap | Lets you enter a count from another reliable record | Adds work and risks duplication; does not create walking-speed or joint-angle data |
Use automatic recording as your main method and manual entry only for a known gap. A consistent source makes comparison easier than switching between unrelated estimates.
A separate comfort log belongs alongside every method in the table. Automatic recording reduces copying, but it cannot explain whether you avoided stairs because of discomfort or simply had a quiet day.
Motion permissions
This configuration lets your iPhone supply movement records to Health. The instructions use Apple's English interface labels; Health navigation differs between software versions, including versions used in 2026.
- Open Settings, then Privacy & Security.
- Select Motion & Fitness.
- Turn on Fitness Tracking. If Health appears in the app list, allow its access.
- Carry your iPhone during your normal walking. Keep it in a consistent position rather than alternating between carrying it and leaving it on a desk.
- Open Health and look for Steps using Search. If your version displays Browse instead, open Browse, then Activity, then Steps.
Expected result: the Steps page shows recorded activity once your iPhone has collected movement data. A quiet chart immediately after setup does not establish a problem with your joints or the recording system.
Do not take an extra walk solely to force a reading. Continue your usual activity within any guidance you have received from a health professional. The goal is to record your real routine, not manufacture a more impressive baseline.
Walking data and source checks
Use a small set of measurements you understand. Steps and walking speed are enough to start; adding every available chart creates more interpretation work without supplying a direct joint assessment.
- In Health, use Search to find Walking Speed. On versions with Browse, open Mobility, then Walking Speed.
- Open the measurement and read its description. Treat walking speed as information about walking pace, not a score for joint health.
- On the measurement page, open Show All Data to inspect recorded entries and their dates.
- Open Data Sources & Access to see which devices or apps contribute to that measurement.
- Repeat the source check for Steps, especially if you use both an iPhone and an Apple Watch.
Expected result: you can identify what is being recorded, when it was recorded, and which source supplied it. Walking Speed remains empty if no qualifying data has been collected.
Apple Health can receive the same type of measurement from several sources. Its source-priority settings help organize overlapping records, but imported or manually entered data still deserves inspection. Do not assume that every connected app contributes a different activity.
If a chart changes abruptly after connecting a device, inspect the source before interpreting the change as personal progress. A new recording source is a change in your measurement setup.
Comfort log and weekly review
The comfort log supplies context that Apple Health's walking measurements do not capture. Keep the wording simple enough that you will actually continue using it.
- Create a note titled Mobility log 2026, or use that heading in a paper notebook.
- Make 1 entry per day at a consistent point in your routine. Record the date, the movement or joint observed, and whether the activity felt comfortable, stiff, or limited.
- Describe a familiar activity rather than inventing a home test. Examples include getting up from your usual chair or taking your ordinary walk.
- Note relevant context, such as leaving your phone at home, changing your walking route, or doing a different activity.
- Set aside 10 minutes per week to compare your notes with Health's steps and walking-speed records.
Expected result: your weekly review contains both movement records and personal context. The suggested schedule organizes your record; it is not a medical assessment schedule or a promise of improvement.
For example, if your familiar walk takes 5 minutes, describe how that same walk felt rather than extending it to challenge yourself. Use a different activity if walking is not appropriate for you. Stop an activity that causes pain and seek appropriate advice.
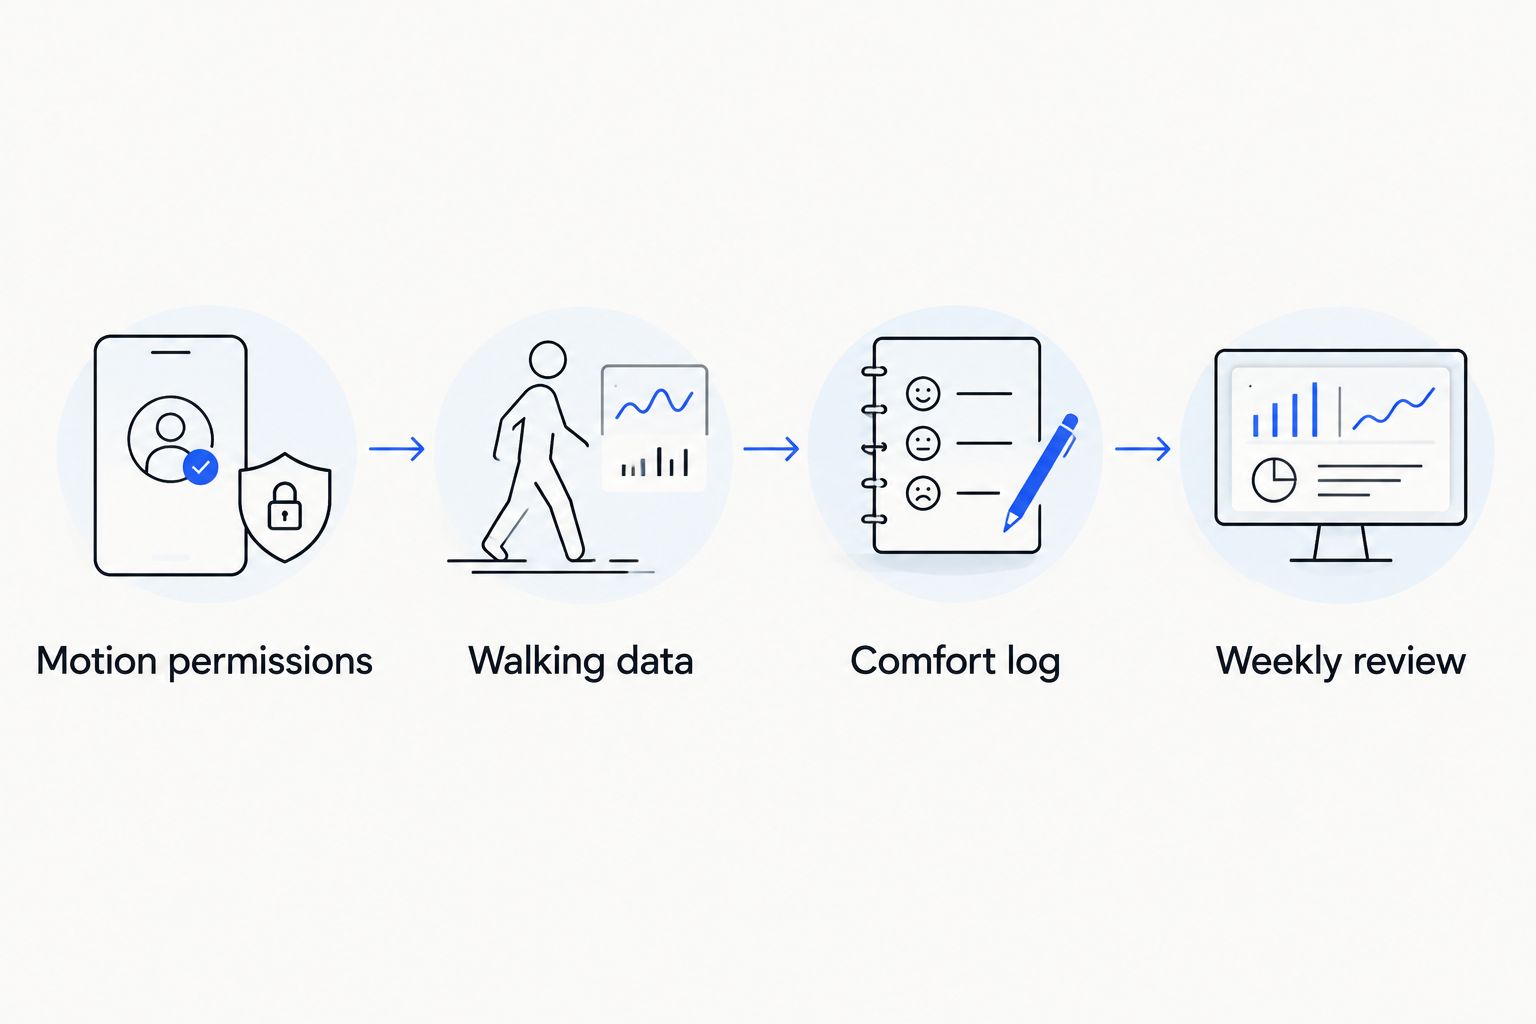
At the weekly review, ask what changed in your routine before asking what changed in your body. More steps after a weekend outing and fewer steps during a desk-heavy week reflect different activity opportunities.
A trend is a prompt for a question, not an explanation by itself. Keep the original notes rather than rewriting them to fit what the chart appears to show.
Manual entry for a missed recording
A second workflow applies when you have a reliable step count that Health did not receive. Manual entry fills that specific gap; it does not synchronize an entire mobility diary.
- Open Health, then find Steps through Search or Browse.
- Inspect Show All Data to confirm that the activity is missing.
- Return to Steps and select Add Data.
- Enter the correct Date, Time, and Steps, then select Add.
- Reopen Show All Data and check the entry.
Expected result: the manually entered steps appear in your record. This entry does not generate a walking-speed measurement or demonstrate a change in joint movement.
Do not manually add steps that an iPhone, Apple Watch, or connected app already recorded. If the gap is uncertain, leave a note explaining the missing device rather than inserting an estimate as though it were measured data.
Manual entry is best for an occasional, documented gap. If you need it every day, fix the automatic recording setup instead. Daily copying recreates the work this workflow is designed to remove.
Troubleshooting
Steps are missing
Check Fitness Tracking under Settings, Privacy & Security, and Motion & Fitness. Then check whether you actually carried the iPhone or wore the recording device during the activity.
A phone left on a kitchen counter cannot record the walk you took without it. Record that gap in your comfort log rather than treating a low count as reduced mobility.
Walking Speed has no entries
Check Data Sources & Access and confirm that a supported source contributes to the measurement. Continue ordinary walking with your iPhone carried consistently; walking metrics depend on qualifying records, not simply on switching a setting on.
Do not substitute step counts for walking speed. They describe different things, and a manual step entry does not create the missing pace data.
The step total looks unexpectedly high
Open Show All Data and inspect entries around the affected time. Look for a manual entry or an imported record that overlaps with activity already collected by a device.
Remove a confirmed erroneous manual entry rather than deleting unfamiliar records indiscriminately. If the discrepancy starts after connecting an app, review that app's contribution under Data Sources & Access.
Your notes suggest better comfort, but the chart looks unchanged
That is not automatically a tracking failure. A familiar movement can feel different while your daily step count stays similar, and steps do not measure how far a joint bends.
Keep both records. Do not force them to agree or label one as wrong simply because they describe different aspects of your day.
A new symptom appears during tracking
Stop using the chart as reassurance and contact a qualified health professional. Seek prompt medical attention for sudden severe pain, a hot swollen joint, or inability to bear weight.
Apple Health is a record-keeping tool. Normal-looking activity data does not rule out a problem that needs assessment.
Customize your workflow
Expand the context before expanding the number of charts. Add a brief note when your workday, exercise routine, or device use changes. If you start or stop a supplement, record that date without assigning later changes to the supplement alone.
TruNutra dietary supplements belong in a separate product-selection decision. Their role is different from Apple's recording tools: reviewing a supplement label helps you assess suitability, while Health helps organize movement data. Neither a supplement purchase nor a rising step count establishes improved joint mobility.
For a desk-heavy routine, the guide to joint health supplements for office workers offers a relevant next reading step. Use the current product label and qualified advice for ingredient, dosage, and safety decisions; do not infer them from a tracking chart.
Keep your 2026 record useful by preserving the same basic workflow when possible. When you change devices or recording methods, note the change so future comparisons have context.
FAQ
How do I track joint mobility in Apple Health?
Use Apple Health to record walking-related measurements and keep a separate log of comfort, stiffness, and familiar movements. Health does not provide a general-purpose measurement of how far an individual joint bends.
Do I need an Apple Watch to track walking progress?
No, an iPhone can record steps and supported walking measurements without an Apple Watch. Carry the phone during ordinary activity and check motion permissions and data sources.
Can Apple Health automatically record joint pain or stiffness?
Apple Health's walking records do not automatically record joint pain or stiffness. Keep those observations in a separate note or another suitable record, and discuss persistent or concerning symptoms with a qualified health professional.
Why is Walking Speed empty in Apple Health?
Walking Speed stays empty when Health has not received qualifying data from a supported source. Check Data Sources & Access and carry your iPhone consistently during your normal walking.
Can I add missing steps by hand?
Yes, open Steps in Health and use Add Data to enter the date, time, and step count. Check existing entries first so you do not add activity that a device or app already recorded.
Does TruNutra sync supplements or mobility progress with Apple Health?
This workflow does not include a TruNutra-to-Apple Health connection. TruNutra sells dietary supplements; movement records come from your devices or other supported sources, while supplement changes can be noted separately.
Does a higher step count mean my joints are healthier?
No, a higher step count shows more recorded walking activity, not a direct measurement of joint health. Interpret the record alongside everyday context, symptoms, and professional guidance.
One last thing
An honest recording gap is more useful than an invented measurement. If you leave your phone behind, write that down and preserve the gap instead of filling it with a guess. Your future self—and any health professional reviewing the record—needs to know what was measured and what was not.